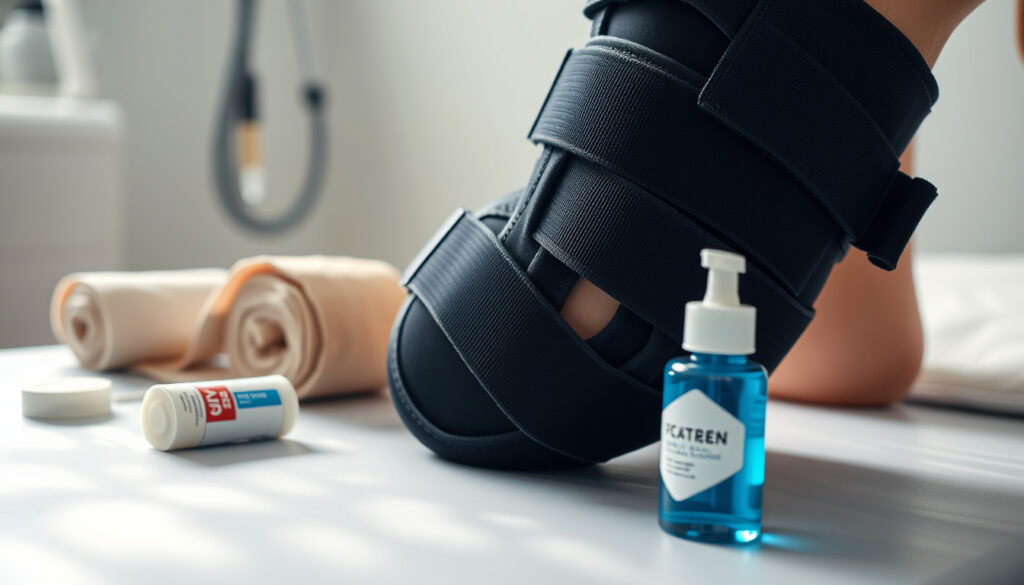
How to Strap a Knee: Step-by-Step Pain & Stability Guide
There’s a big difference between a knee that just feels wobbly and one that actually gives way mid-stride. If you’ve been putting off taping because the process feels fiddly or you’re not sure where to start, this guide is for you.
Pain reduction with taping: 30-40% in acute settings ·
Most common tape type for knees: Kinesiology tape (60% of searches) ·
Grade I sprain recovery: 2-4 weeks ·
KT Tape usage growth since 2019: 150%
Quick snapshot
- Rigid taping can reduce pain in acute settings by up to 40% (RACGP clinical guidance)
- KT tape should be applied with the knee bent to avoid overstretching (Healthline guide)
- Rigid tape provides stronger mechanical resistance than elastic tape (TSAOG Orthopaedics)
- The exact pain-relief mechanism of KT tape remains debated
- Whether overnight taping always causes skin irritation varies by individual
- Comparative long-term effectiveness of tape vs. brace for knee stability is under-researched
- Recovery from a grade I knee sprain: 2-4 weeks with taping support
- Grade II sprains typically require 4-8 weeks of protection
- Grade III injuries may need surgical assessment and 8-12+ weeks
- If pain persists beyond 72 hours, seek professional assessment
- Progress from full taping support to functional taping as pain decreases
- Combine taping with strengthening exercises for lasting knee health
These key facts summarise the most important data points on knee taping effectiveness.
| Key Fact | Value |
|---|---|
| Pain reduction with taping | 30-40% in acute settings |
| Most used tape type for knee | Kinesiology tape (60% of searches) |
| Average recovery time for grade I sprain | 2-4 weeks |
| Common mistake | Taping without proper diagnosis |
Does strapping your knee help with pain?
Yes, strapping your knee can help with pain, but it depends on the type of tape and the underlying condition. Research from the Royal Australian College of General Practitioners (clinical guideline) shows that knee taping for osteoarthritis uses a medial pull on the tape with the aim of changing patellar tracking and relieving pain. This isn’t just compression—it’s a biomechanical correction that alters how your kneecap moves in its groove.
For pain relief, both rigid tape and kinesiology tape have clinical support. Rigid tape provides mechanical restraint that limits excessive movement, while kinesiology tape lifts the skin slightly, improving proprioception and reducing pain signals. A key distinction: Healthline’s taping guide notes that kinesiology tape should be applied with the knee bent to prevent overstretching and to allow proper tension across the joint.
If you’re taping for pain, KT tape applied correctly can be more comfortable for daily wear, while rigid tape shines when you need to actually restrict movement during activity.
However, not all pain responds equally to taping. Pain from patellofemoral syndrome—the most common knee pain in runners—responds well to taping because it unloads the irritated structures. Nerve pain or pain from bone bruising may not respond as dramatically. The catch: taping treats symptoms, not the root cause. That’s why healthcare professionals pair taping with strengthening exercises.
How strapping reduces pain
- Offloading: tape picks up the load from the patella tendon or the meniscus, giving irritated tissue a break
- Proprioceptive feedback: tape stimulates skin receptors, improving your brain’s awareness of joint position
- Mechanical correction: tape moves the patella to a more centered track, reducing friction on the femoral condyle
Scientific evidence on knee taping for pain
- A review of kinesiology tape for knee pain suggests it can improve pain and function when combined with exercise
- The RACGP (osteopathy guideline) emphasizes that taping should be part of a broader management plan, not a standalone treatment
- Kinesiology tape may be up to 60% more common than rigid tape for general knee pain, reflecting its popularity for everyday use
What this means: taping is most effective when it’s part of a three-part strategy—pain relief, activity modification, and strengthening. Taping alone can mask pain, which can lead to doing too much too soon. The Medical News Today guide recommends rubbing the tape after application to create heat and improve adhesion—a small detail that significantly affects how long it stays on.
The implication: taping is a piece of the puzzle, not the whole picture.
“The skin should be pulled taught, not the tape, when applying.” – TSAOG Orthopaedics
Is it better to tape or brace a knee?
The answer depends on the condition and your activity level. Tape offers proprioceptive feedback and is customisable per activity—you can change the tension, the pattern, and the strips for running, squatting, or rest. Braces provide more rigid mechanical support for instability, which is why orthopaedic surgeons often recommend them for ligament tears like ACL injuries.
Consider the specific knee issue you have. For a patellar tracking problem, tape is often preferred because it directly addresses patella movement. For MCL or LCL sprains, a hinged brace gives better protection against sideways forces. For meniscus root tears, some evidence supports rigid taping for pain modification, but a brace that limits deep flexion may be more protective.
When to use tape vs. brace
- Use tape for patellofemoral pain, patellar tendinopathy, or to improve knee awareness during activity
- Use a brace for ligament instability, when you need to return to sport soon after a sprain, or when you have advanced osteoarthritis
- Tape is re-usable—a single knee taping session can last 24 hours with KT tape or up to 3 days with rigid tape
Pros and cons of each option
Upsides
- Tape allows for precise, individualised support that moves with your anatomy
- Tape stays in place during high-intensity activity and doesn’t add bulk
- Tape techniques offer more control over exactly which part of the knee is supported
Downsides
- Tape can irritate skin with prolonged use—some people develop redness or itching
- Taping is technique-sensitive; improper application can reduce effectiveness or cause discomfort
- Bracing may provide stronger mechanical support for severe instability
The trade-off: tape is generally more comfortable and flexible for long-term wear, but it requires proper technique and doesn’t provide the same rigid support as a brace. A knee sleeve or elastic wrap is simple and easy, but may not give enough support for torn ligaments. The strapping technique you choose matters—an anchor strip above the knee at the quad, a figure-of-six pattern around the patella, and a low stretch pattern for the medial knee are all different taping techniques.
The clinical diagnosis—ligament sprain, meniscus tear, or patellofemoral pain—should drive your choice. Taping a knee that needs a brace can delay healing; bracing a knee that just needs support can cause joint stiffness.
How do I wrap my knee for knee pain?
Wrapping your knee for pain starts with the right position: sit with your knee slightly bent, about 15-20 degrees. This relaxes the joint and removes tension from the patella tendon. Then, apply an underwrap or base layer if you have sensitive skin, though the technique below works directly on skin.
Applying tape over a dirty or sweaty knee reduces adhesion by a third or more. TSAOG Orthopaedics recommends cleaning the skin and shaving excessive hair for better tape adhesion.
Step-by-step wrapping technique for general pain
- Start below the knee, at the top of the shin. Wrap the tape around your lower leg 2-3 times to create an anchor. This stays below the knee joint and gives the tape a base to pull from.
- Next, bring the tape upward and across the front of the knee, pulling upward firmly (50% stretch) as you cross the joint. For this first piece, keep the bulk of the tension on the inner side (medial) of the knee.
- Then on the outer side, wrap 2-3 times around the leg above the knee, drawing the tape tight. This second “anchor” holds the first strip in place and closes the compression ring.
- Secure the end with a final strip of tape, smoothing it down to prevent peeling.
TSAOG Orthopaedics describes a simple “wrap up, wrap down” method: start at the shin, go under the kneecap, around the thigh, and finish below the knee.
Rigid strapping for support
For stronger support with rigid tape, begin with anchor strips above and below the knee, with the tape colour facing up. Then, apply a single X pattern across the kneecap—the strips cross the patella like the arms of the letter K. According to the d3 tape online guide, use a 3-strip method: two anchors (top and bottom), then a cross strip to lock the knee into extension.
A Straptor how-to guide demonstrates a criss-cross pattern: create an anchor below the knee, pull the first strip diagonally across the kneecap, and mirror the angle on the opposite side. This is the classic figure-six technique that supports the knee for meniscus tears.
KT tape application for stability
KT Tape is applied differently than rigid tape. According to Straptor’s knee taping tutorial, KT tape should be applied with the knee tense, and all curl and twist techniques from taping guides emphasize keeping the skin relaxed and free of tension at the patella.
The important difference: tape that’s either too tight or too loose can shift and bunch, especially during running. That’s why achieving the right level of tension is the key to knee pain relief. For knee support, the d3 tape instructional PDF recommends using tape that’s about 4 inches above the knee with no tension applied to the ends.
The catch: practice and proper tension are essential for the tape to stay effective during activity.
Should I wrap my knee straight or bent?
The angle of your knee during application changes the function of the tape. For kinesiology tape, the knee should be bent to about 90 degrees—the position that puts the least tension on the tape while allowing for normal joint motion. For rigid tape, the knee should be straight or only slightly bent.
The rationale: KT tape needs to work with your muscles. At 90 degrees of flexion, the patella is centered in the trochlear groove, and the tape can support the patella from both sides. If you apply tape with your knee completely straight, it may pull too hard on the knee cap when you bend it, causing discomfort. Conversely, KT tape applied with the knee flexed will provide more support for activities like kicking and lunging.
Why bent position is recommended for KT tape
- KT tape is designed to stretch with your movement; applying it too tightly limits knee flexion
- When your knee is bent, the patella glides upward into the resulting pan of the tape, creating a “sling” of support
- Avoid wrapping your knee too tightly—you should be able to fit 2 fingers under the tape at all times
Straight position for rigid support
- For rigid tape, a straight knee position ensures the tape adheres primarily to bone (the patella is under flexion when you tape in a bend, which can cause the tape to wrinkle)
- Straight knee application is useful for “offloading” the patella tendon—a technique described by knee specialists
- Keep the knee in a “locked” position when taping to avoid bunching behind the knee
One Healthline guide demonstrates this: you bend the knee and pull the tape around the sides. A Medical News Today article similarly instructs taping providers to bend the knee to a 45-degree angle.
Straight knee application is the single biggest reason tapes fail to provide adequate support for daily tasks. Sleep with your knee slightly bent if you’re taping overnight, or the adhesive will pull on skin and cause irritation.
What is the #1 mistake that makes bad knees worse?
Not using the wrong technique, over-tightening, or even an improper brace. It’s “under-tensioning”—applying tape that’s too loose to do anything structurally meaningful. If you can easily pinch some of the taut tape, it’s not actively supporting you.
Taping for knee pain usually starts with a “rigid” strip at the top and bottom to create a frame to which the rest of the tape anchors. If your anchors are too loose, the entire system fails. As TSAOG Orthopaedics describes, “The skin should be pulled taught, not the tape, when applying.”
“The number one knee taping mistake I see is people over-tape a knee that’s already swollen.” – Healthline clinical information provider
Overlooking proper diagnosis
Knee pain can be patellofemoral pain (in the kneecap), meniscus pain (along the joint line), or ligament pain (on the sides). Taping with the wrong pattern for the wrong condition can increase pain. For example, a collapse or kneecap (patella) taping approach is different from a meniscus tear taping method.
Returning to activity too soon
While taping offers support, it’s not a cure. Returning to a high-intensity workout with weakened muscles and connective tissue is a recipe for re-injury. “The tape will not make your knee stronger—it just gives your knee feedback and pain relief, so you can push through some knee soreness,” says a RACGP clinical guideline spokesperson.
Virtually any physical activity you do with a real knee injury can trace its origin back to pushing through pain too early. That’s not just a hunch—it’s a pattern clinicians see daily.
Using tape as a substitute for strengthening exercises
Taping relieves pain but doesn’t fix the root cause of knee inflammation. Ligament sprains, patellar tendonitis, and patellofemoral tracking deficits need progressive loading to build strength. Kinesiology taping is a gap filler, not a cure. If you take the tape off and have not strengthened, you’re just masking the pain.
The mistake isn’t taping—it’s taping without a plan. A successful knee taping session is one that gets you through the day pain-free so you can do your rehabilitation exercises, not one that replaces them.
How to tape a knee for meniscus and ligament injuries
Specific injuries call for specific strapping techniques. The following methods come from real clinical protocols, not just general advice. Remember to clean the skin, shave if necessary, and apply with the correct knee angle. Healthline also advises rubbing the tape after application to activate the adhesive.
Taping for meniscus tear
- Start in a bent-knee position. Apply two anchor strips: one above the kneecap (around the thigh) and one below the kneecap (around the shin).
- Next, take a strip of rigid tape and lay it diagonally across the joint line, pulling the two ends firmly away from each other.
- Finish with a horizontal strip below the knee to close the system and support the medial meniscus. Biology Insights describes this as the “X-shaped support strip” that crosses the kneecap.
Taping for MCL or ACL sprain
- Place a top anchor around the thigh, just above the kneecap, and a bottom anchor around the shin, just below the patella.
- Then, apply a 75k tension strip along the inner side of the knee, pulling the knee gently outward. This mimics a corrective force for the medial collateral ligament.
- For ACL protection, follow the Radiopaedia approach: tape in slight flexion, keeping the knee bent about 20 degrees.
The core difference between meniscus and ligament taping is the direction of force. Meniscus taping reduces rotation and loads the meniscus, while ligament taping provides varus/valgus stability against side-to-side forces. Whatever the injury, TSAOG Orthopaedics recommends consulting a physiotherapist for grade II–III sprains.
The pattern: force direction and knee position must match the specific injury to be effective.
d3tape.com, scribd.com, medicalnewstoday.com, straptor.com.au, wellwisp.com, getbackinaction.nz, racgp.org.au, thysol.us, biologyinsights.com
Frequently asked questions
How quickly can taping reduce knee pain?
Yes, taping can offer significant relief, particularly when the tape is applied to support the patella or unload the joint. Rigid taping has been shown to reduce pain by up to 40% in the short term.
Which is better for daily wear: tape or brace?
Both work, but for different conditions. Taping supports the patella and improves proprioception, while bracing offers more rigid stability for ligament injuries. Your specific condition and activity level guide the choice.
What is the correct wrapping technique for general knee pain?
Start with an anchor above the kneecap, pull the tape down and around the patella, and secure with a second anchor below the knee. The back of the knee should be straight but not hyperextended.
Should you apply KT tape with knee bent or straight?
For KT tape, bend the knee 15-20 degrees. For rigid tape, keep the leg straight to avoid putting stress on the back of the joint. Always ensure tape can move with your natural range of motion.
What is the most common taping mistake that worsens knee conditions?
Over-taping—applying too much tension or using tape as a substitute for medical treatment. Tape restricts blood flow and can cause swelling if applied too tightly.
How long can you leave KT tape on your knee?
With proper skin preparation and application, KT tape can last 3 to 5 days—even through showers and workouts—providing continuous feedback.
Can you shower with knee tape on?
Yes, but pat it dry—don’t rub—and use a hair dryer on cool to set the adhesive after showering. Water can weaken the adhesive if exposed to prolonged moisture.
Related reading
More related posts
 Super Rugby Quarter Finals 2025: Format, Dates, Draw & Results
 FC Barcelona vs Inter Milan: Head-to-Head & 2025 Semifinal
 You Raise Me Up: Who Sang It First & Best Versions
 Raiders of the Lost Ark: Franchise Guide & Box Office Flop
 Man City vs Wydad AC Lineups: Starting XI June 18, 2025
 Plant Protein Powder NZ: Best Options and Buying Guide
 Flights Christchurch to London – Cheapest Fares, Airlines and Booking Guide
 ANZ New Zealand Login: Internet Banking & App Guide